Bones of the Foot
If you've been following my Anatomy for Artists course from the beginning, you've learned how to draw almost the whole skeleton. We've worked our way down the body, all the way to the foot bones.
The foot is challenging to draw for a number of reasons. It's flexible - much more than you might think - and contorts itself into different forms for every pose. It's asymmetrical. You have to keep track of what's medial and what's lateral, which can be confusing if you don't have a way to simplify. Finally, the foot will, very often, be on the ground. That means you have to be confident about ground planes and perspective.
Fortunately, the bones are a great way to study the foot. Since the foot is so bony, knowing the inside anatomy directly helps you draw the outside surface. This lesson will focus on the overall design of the foot, and the form, proportion, and mobility of the individual bones.

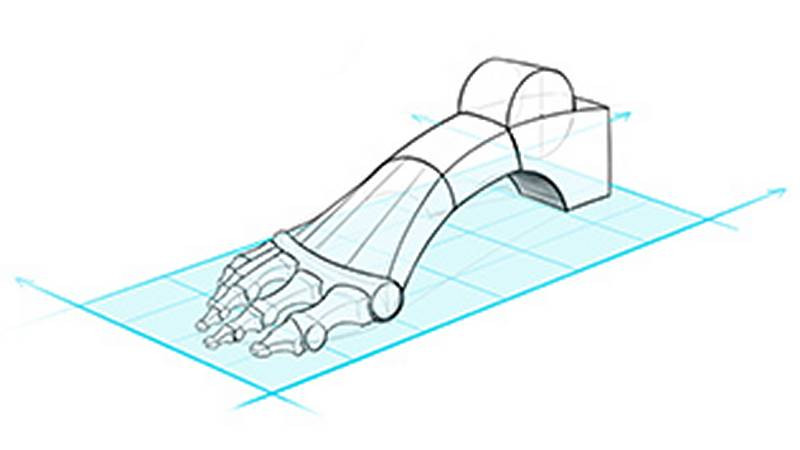
Strong, Flexible, and Springy
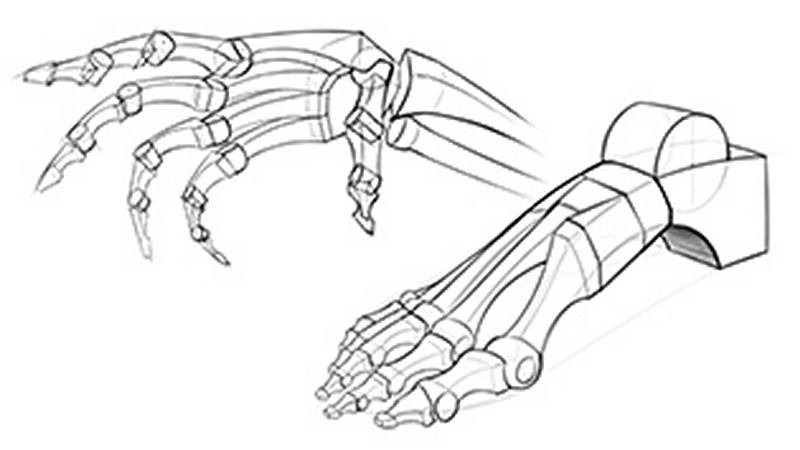
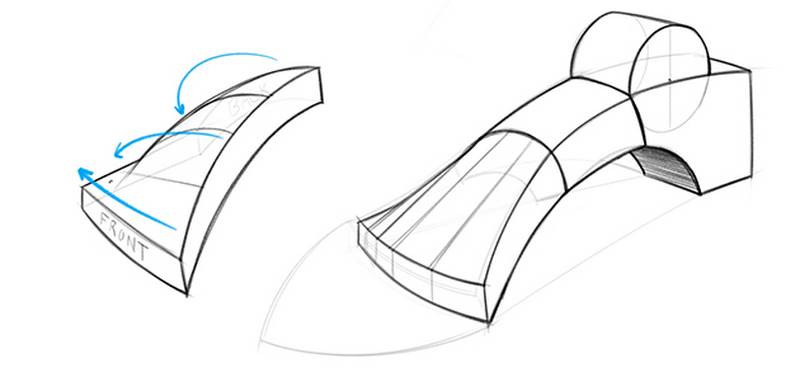
There's another design difference as well. The foot is built with arches. This design allows the foot to bear the weight of the body. Have you ever tried to squeeze an egg? It's surprisingly difficult. The arches distribute the pressure and make it strong. It's why we use arches for doorways, bridges, and other structures that need to be strong. A foot's arches make it strong enough to bear the weight of the body.
Another benefit of this design is shock absorption. Your foot flattens when it hits the ground - it literally spreads out so it's wider and longer and flatter. When you lift it up again, it springs back to its tall arched form. That flexibility lets us adapt to uneven surfaces.
Artists can take advantage of the foot's flexibility, and even exaggerate it to show springy, tall, skipping feet; heavy, squashed standing feet; and even hyperextended toes digging into the ground as the foot pushes off. The zigzag pattern shows the tension.
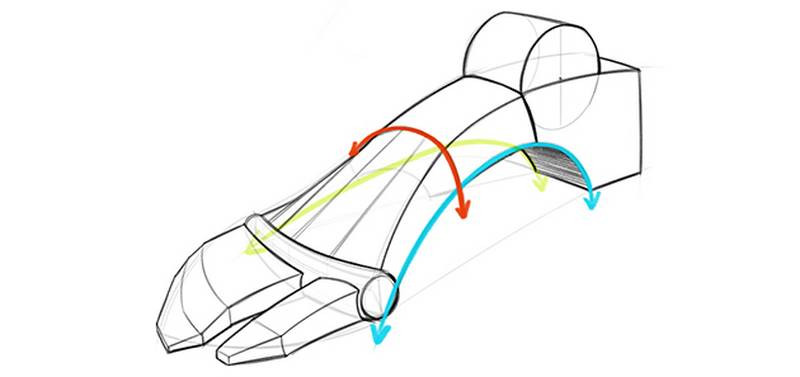
The form of the foot is made of 3 arches, but This 3-arch form of the foot is kinda complicated. So we need something simpler to start with. The height of the foot is about ⅓ the overall length. It's also about equal to the width of the foot. So, you can start with 3 equal boxes and you'll have a pretty good proportion guide. Within this container we can draw an elongated pyramid-like form with toes in the front and blocky heel in the back that extends past the ankle.
Then we can apply those 3 arches and some other stuff that makes the foot more real. But we went through that too quickly. To be able to simplify the foot like this, we need to dive in and first learn the complex forms that these simple forms represent.
The Tarsals
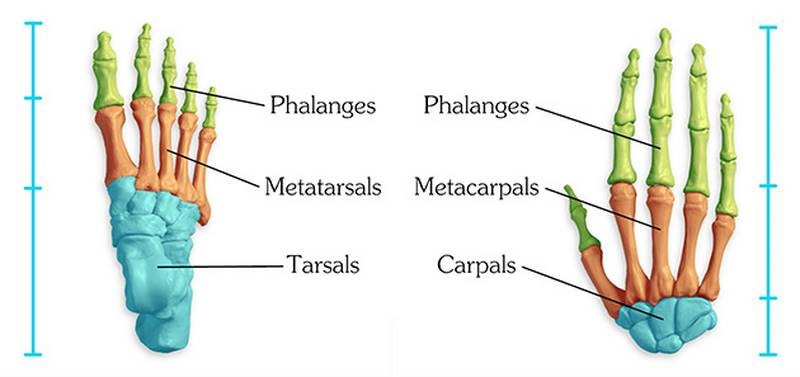
The tarsals are the ankle bones, seven bones in two rows. They take up almost half the length of the foot. Even though they look like stacked bricks glued to each other, these bones are not static. The joints between the tarsals invert and evert, and flex and extend.
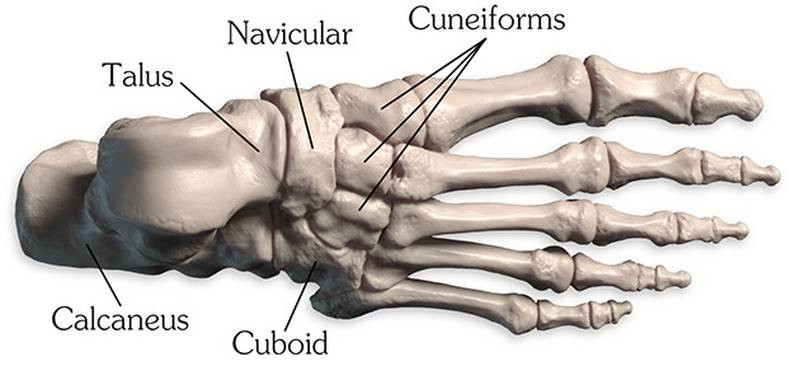
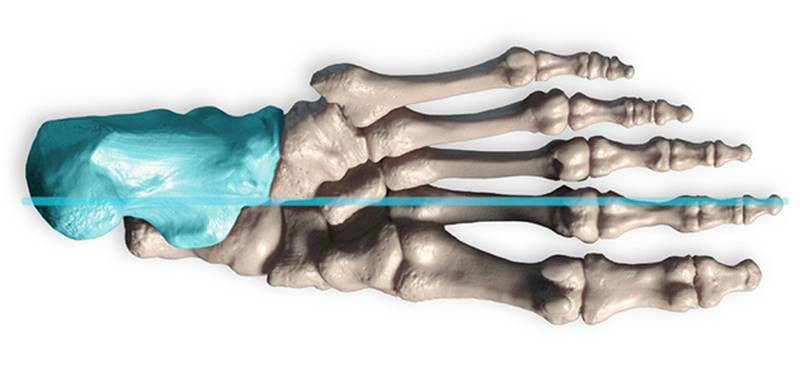
On top of the calcaneus is the talus bone. It's a wheel that the tibia and fibula grab onto to form a hinge joint. This wheel shape makes it easy for the foot to bend up and down but difficult to rock side to side. That side to side motion happens at another joint - between the talus and calcaneus. It's a rather complicated structure. The calcaneus has 3 platforms for the talus and they meet with this S curve. And basically, they allow the foot to rock side to side.
The last bone in this row is the navicular. It's named after a boat because it has a boat-like shape. The concave plane of this boat is the socket to the ball-in-socket joint that it forms with the talus. The head of the talus is the ball. It's basically a buffer between the talus and the next row of bones. It plays along with inversion and eversion. When the head of the talus dips under the navicular towards the ground, the foot "pronates," or splays out, and the arch of the foot flattens.
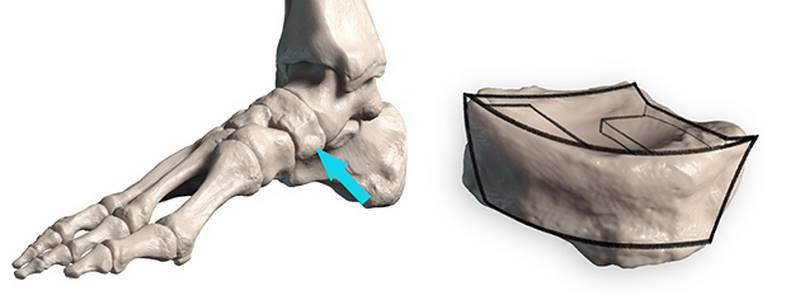
The important thing is the bump seen above. You can see it on the surface of the side of the foot, especially during inversion.
he second row of bones is easier. There's four bones here: three of them are named "cuneiform," and the last one is named "cuboid." They fit together with varying shapes. Let's look at them from the front. This is the transverse arch. It's designed like an old stone bridge to carry the weight of the body horizontally across the foot.. The inner two wedge in tightly between the outer two.
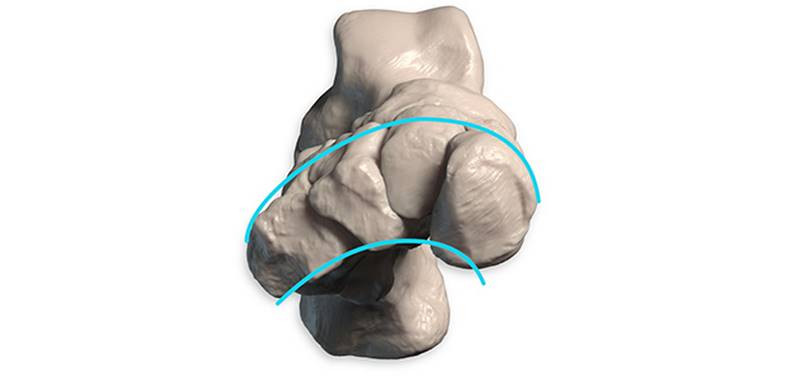
And those are the tarsals. Let's review before moving on. The heel bone is a big block. Sitting on top of it is this wheel that's gripped by the wrench of the tibia and fibula. There's that boat shaped bone, and then the second row, the old stone bridge. Now let's move on to the next row.
Metatarsals
he metatarsals meet the tarsals with plane joints.
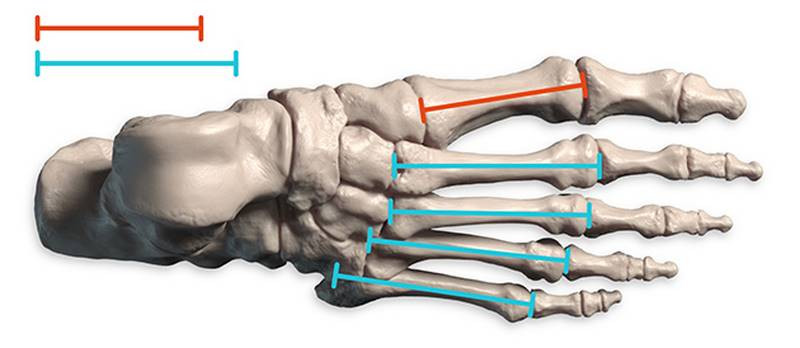
The metatarsals of the foot have the same design as the metacarpals of the hand. They're long and slender, with a base, shaft, and distal head. The metatarsals are all about the same length, except for the big toe. It's a little shorter and much thicker. Its medial edge is actually subcutaneous; try feeling it.
Phalanges
Along with the heel, they create a tripod structure, and these three points balance the whole weight of the body. So, a human foot is built for mobility and balance. Walking upright, running, that sort of thing. Other primates like gorillas and monkeys have feet that seriously resemble hands, because their feet are built more for dexterity.
Like the fingers, the toes each have three phalanges with strong convex curves. Each is like a bridge. A stable structure.
Like the thumb, the big toe only has two phalanges. But those two are thick and strong. There are sesamoid bones tucked under the big toe that give its flexor muscle some leverage.
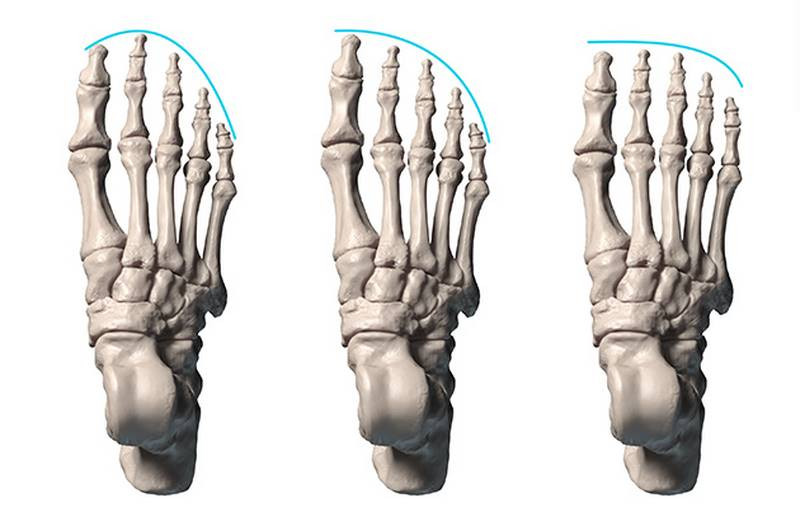
The other four toes are much thinner. The second toe is usually the longest toe, though some people have longer big toes, called an "Egyptian" foot. Some might be more squared off with all the toes a similar length. There's gonna be variety as with every part of the body. Capture that how you want, or idealize it by using this curve with the peak at the second toe. The "Greek" foot.
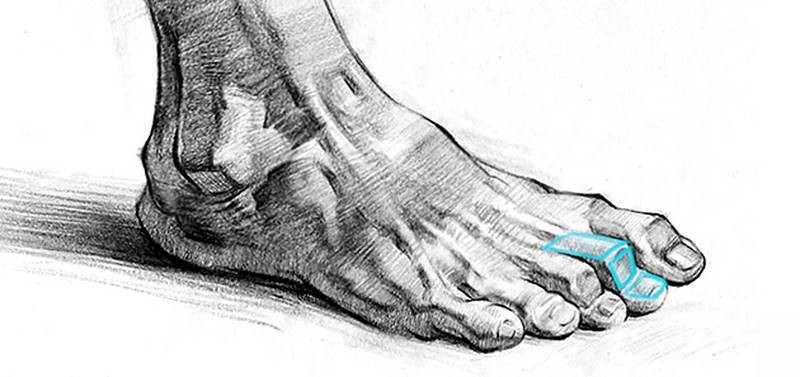
These subtle differences in shapes and angles can make the toes look interesting to have more character and motion. And that's it for the skeleton of the body... You did it! Pat yourself and get ready to put some flesh on the legs.
In the premium version of this lesson I go into more details about the forms and motion of the foot. I’ll also demonstrate how to do each pose in the assignment.
Assignment
Your assignment is to simplify the foot bones into their basic forms. Draw from life using your own feet or draw from the 3D models I provide you. You'll find still images of foot bone poses in the download below.
Post your work and participate in the discussions tab.


