In the last lesson you learned about the nose and how to draw it step by step. Now it’s time to look at lips! Lips are very expressive. Many muscles working together to pull on various parts of the lips. Also it’s the only feature that involves bone movement.
Basic Forms
the tooth cylinder that fits right between the nose and chin, can be simplified into a bloated tuna can. By bloated I just mean that the wall of the cylinder curves out rather than being flat. This comes into play when looking at the lips from any angle other than straight on. The bloated tuna can affects the surface forms of the lips. The center line of the lips gets pushed outward and when viewed from top or bottom, the lips wrap around the cylinder. Notice that from this angle, the corners of the lips are actually lower than the bottom of the bottom lip.

Try to avoid drawing the lips on a flat surface.
Major Planes
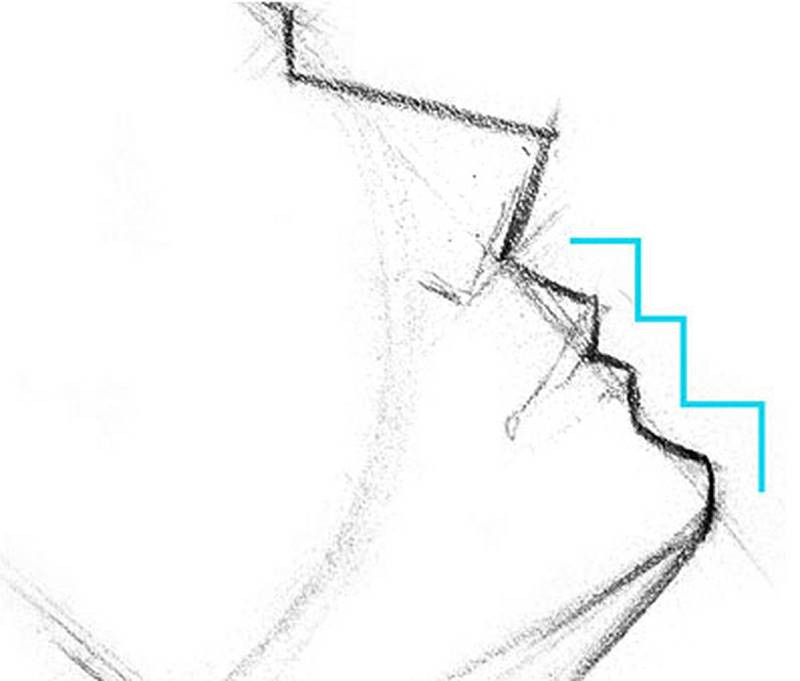
The major planes of the lips are very simple. They are very much like a staircase of 3 steps from the chin to the base of the nose. In fact, if you look at the head from profile, the entire front of the face is like a staircase. The major planes alternate from top plane to bottom plane.
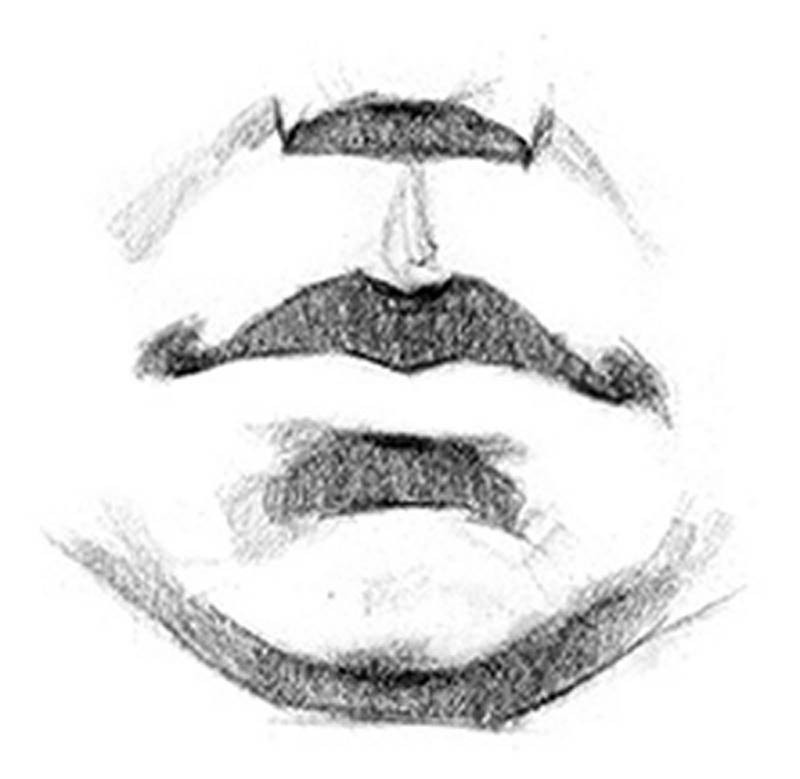
When drawing from a front view, this staircase is usually indicated by alternating dark and light shapes.
Anatomy
Let’s go over a little bit of anatomy. The red portion of the lips and the part directly above and below is called the orbicularis oris.
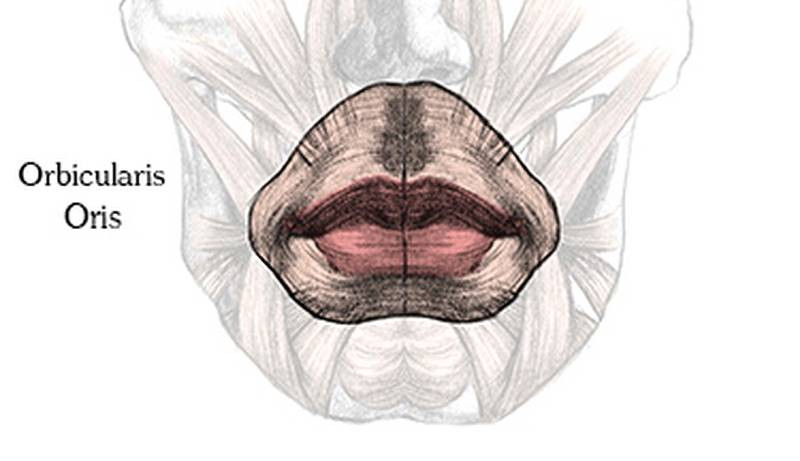
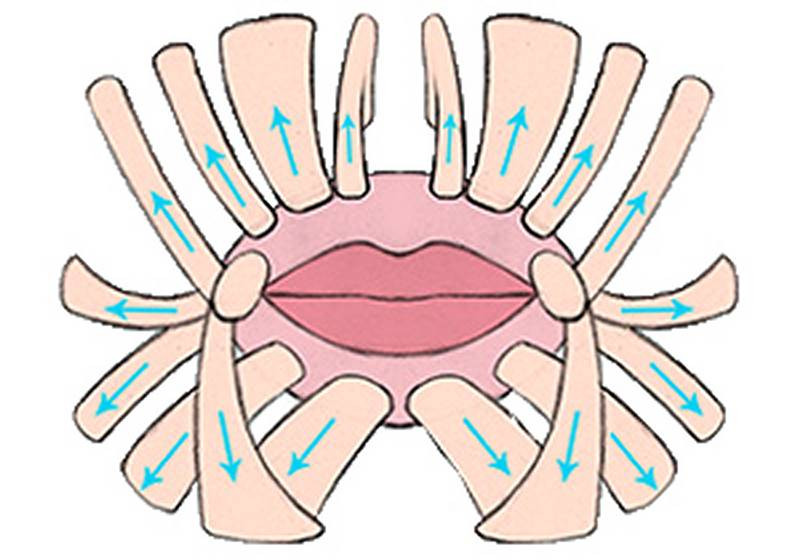
It originates at the corners of the lips called the nodes. These nodes are visible as ‘bumps’ since so many muscles meet and overlap here. In this simplified diagram you can see that there are a lot of muscles that attach around the orbicularis oris and pull on it to form various expressions.
The orbicularis oris can also tighten to form an ‘O’, or to blow a kiss.
The lips attach to the tooth cylinder at the base of the nose and the top of the chin.
Minor Forms
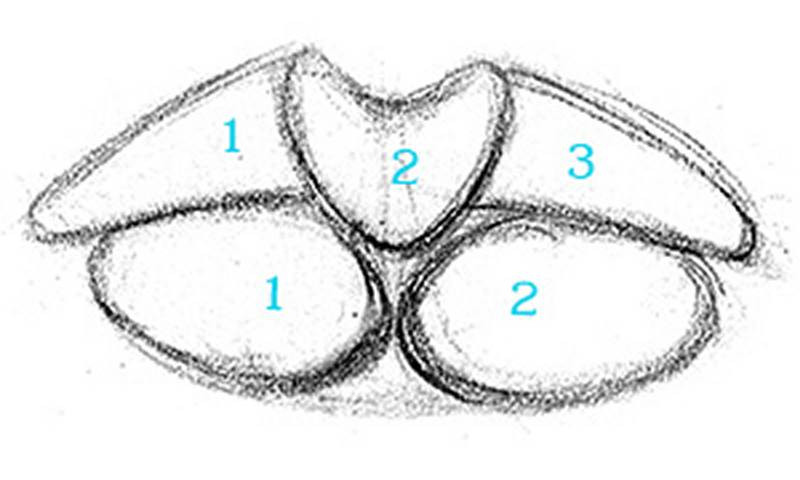
The top lip has three forms and the bottom lip has two. Think of these forms as squishy little pillows. The rounded form in the middle of the top lip (called the tubercle) is shaped like a heart and wedges between the two forms of the bottom lip. When looking at the lips from an angle, these forms overlap each other adding depth. When drawing a foreshortened object, I always look for overlapping lines to show a form is in front of another.
Overlapping forms are indicated by T intersections. The lower left overlaps the tubercle, the tubercle overlaps the lower right, the lower right overlaps the top right, and the top right overlaps the far corner.
The local value of the red portion is different from the local value of the skin. The relationship depends on the race of the person. With darker skin, the lip could be lighter, and with lighter skin, the lip could be darker. If the person is wearing lipstick, that would change the local value of the lips.
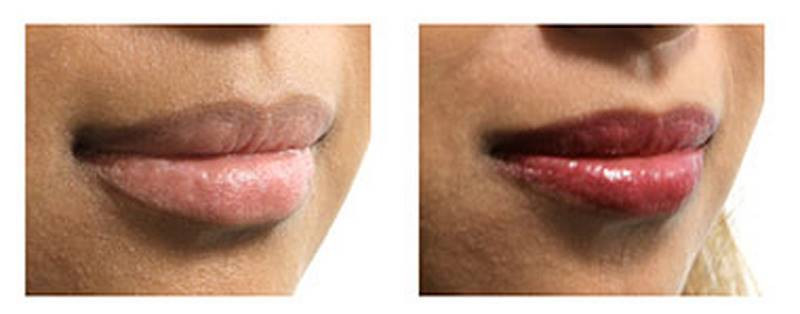
Because the lips have a bit of moisture, the highlight will appear brighter and sharper than the highlights on the skin. Unless of course, the skin is also wet…
When shading the lips, pay attention to the minor planes changes of both the top lip and bottom lip. The darkest tones will usually be around the crease, corners and core shadows at the top of the top lip and bottom of the bottom lip. Each of the squishy pillows will have subtle tones indicating their volumes.
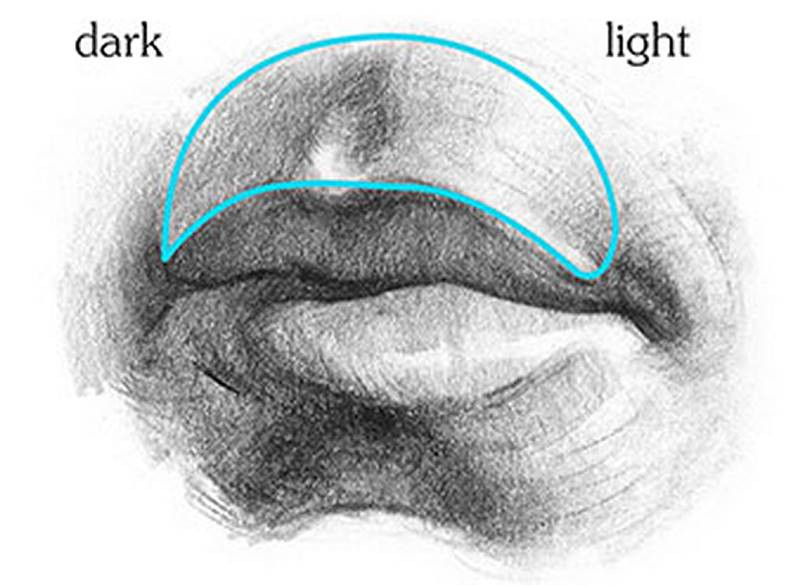
This upper region of the lips usually has a gradation revealing the rounded ‘tuna-can’ shaped tooth cylinder underneath. In the middle of the upper lip region is the philtrum, a concave depression composed of two planes. The darker plane of the philtrum will be on the opposite side of the dark on the overall upper lip region.
The edge of the upper lip has a small ridge, or top plane that sometimes catches light. I try to play down this effect and avoid drawing a white outline. This could look like a milk mustache.
The ridge that borders the bottom lip is steep in the middle and softer on the outsides. The lower lip region has two pillars that angle inward toward the top. Together these two pillars form an arch under the bottom lip, which is often in shadow since it faces downward.
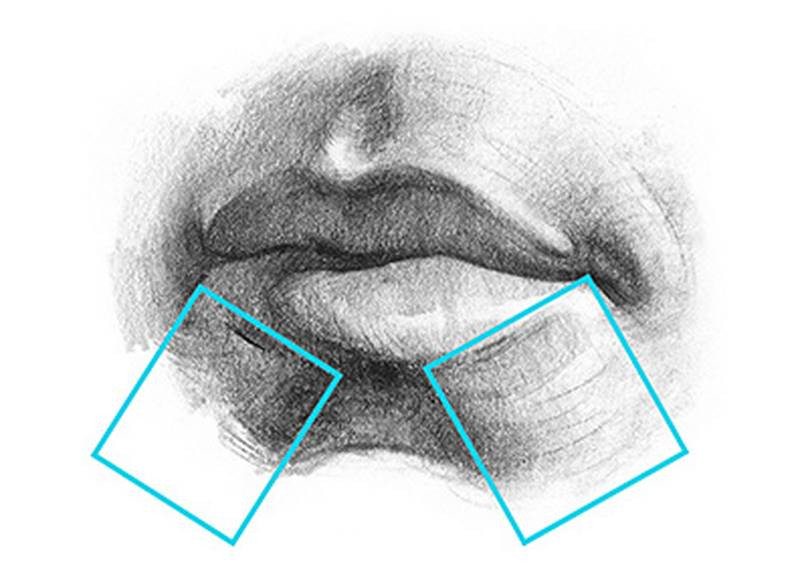
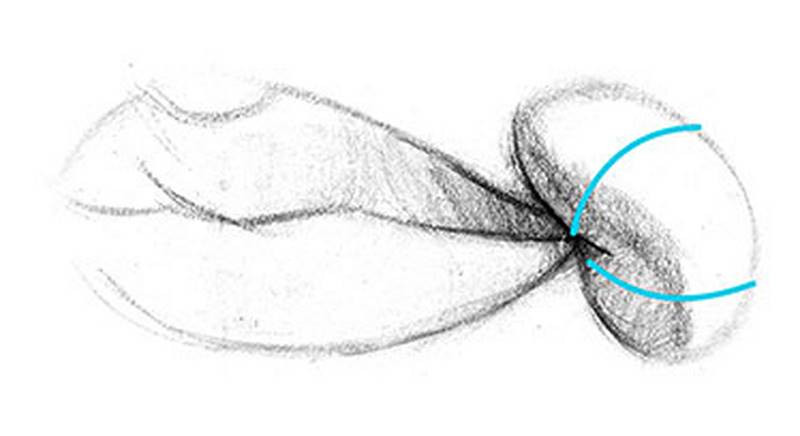
At the corners of the lips, there are bumps where many of the muscles connect. The volume of the nodes is similar to a bean. When shading, make sure to think of it as a rounded form that pinches inward. The roundness of the bean creates a soft edge at the outside and top. The pinch creates a sharp edge at the inside and bottom.
Think you absorbed all the information? Good! Move onto the next lesson where I cover how to draw the lips step by step.


