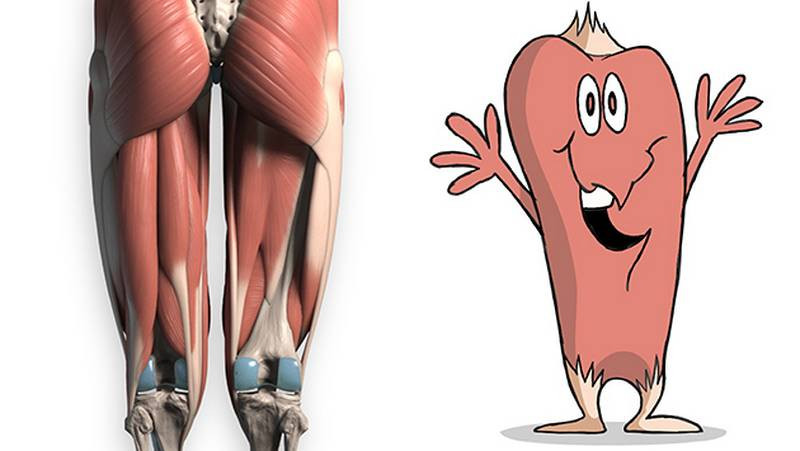
Hey, I'm Stan Prokopenko, welcome to Proko! In the last lesson, we drew the muscles on the front of the leg, which straighten the knee and flex the hip. In this lesson, we'll learn how to draw the muscles on the back of the leg, which bend the knee and straighten the hip. Introducing: the hamstrings!

The hamstrings mush together and sit quietly on the back of the leg. They're hard to see...

Unless you're this guy... Then what the hell!
So, in this lesson you'll learn the basic anatomy and how to draw the forms of the hamstrings and their far-reaching tendons. In the premium Part 2, we'll take a closer look at the anatomical details and explore body type variations of the leg.


Muscle Bellies
Alright, time to go under the hood. Look at how straight and parallel the hamstrings are. They look like pistons and cables. When we hide the glutes, we can see their origin on the ischial tuberosity of the pelvis.
There are four muscle bellies. The two on the outside are the short head and long head of the biceps femoris.

The two on the inside are named semimembranosus and semitendinosus... which is semi-ridiculous. I'll explain in the premium episode, part 2. On each side there's a belly up high that sits on a belly that hangs low.

he sizes are not equal though. They're not symmetrical.
Let's break them down into ovals for simplicity. The inside has a really wide oval underneath and a really thin oval on top.
The outside has two medium ovals, one on top of the other. The group on the inside is wider than the group on the outside. But we don't usually see four muscle bellies when we look at the hamstrings.

In a standing leg, a layer of fat smooths the bellies and the adductors into a single round form... So I draw this as a flattened cylinder, or egg-like form. This form is angled slightly like this, in the opposite angle of the femur. In terms of planes, the back of the leg is a trapezoid. There's a narrow backplane, and sides that angle away.


Tendons
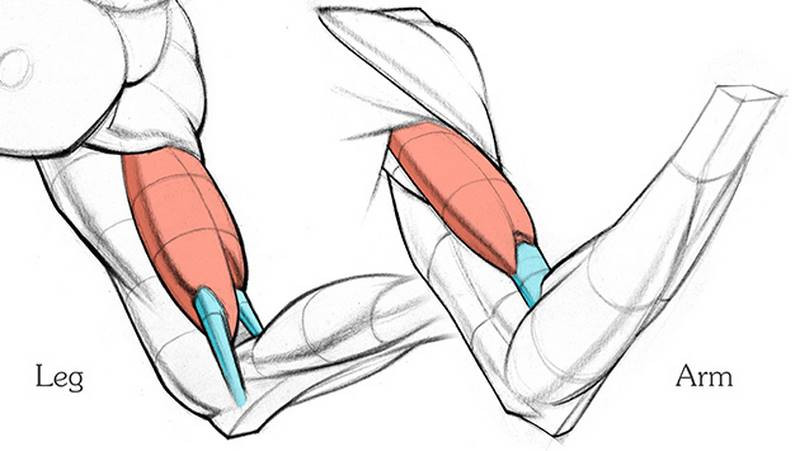
The quads came together into a single tendon down the middle that wrapped over the patella... The hamstrings go out of their way to avoid coming together. The tendons split away and leave a cave between them. Or a tunnel that the calves travel into.
These tendons ultimately attach to the sides of the lower leg bones. They kinda steal the show from the hamstrings. Artists who master the hamstrings, master these tendons.

They provide the much needed structural straights in the knee area of the leg. Adding contrast to all the roundness above and below. Even on people who don't have a lot of muscle mass, these tendons create a rhythm. A very curved butt, to the longer curved hamstrings, to a straight into the back of the knee, to another curve in the calves and a straight down the achilles tendon to the heel.
On the outside, biceps femoris shoots down the leg and lands at the head of the fibula, which is really convenient because we have a straight arrow pointing to a bony landmark. The calf muscle emerges from behind the tendon. This is an important overlap that creates a shorthand for the back of the knee. Just be careful that you don't mix up the hamstring tendon with the bottom of the iliotibial band, which is another powerful tendon running down the side of the knee.

On the inside, the medial tendons come together with the sartorius and gracilis and insert on the front of the tibia, next to the tibial tuberosity. Also note that from back view, the inside of the knee appears lower than the outside of the knee. Remember the zig zag to add asymmetry when designing the leg.
In a standing leg, the hamstring tendons look like chopsticks holding a hard boiled egg. Or ice tongs. Or even fangs! Yeah, let's go with fangs.
The fangs clamp onto the sides of the knee, and hold this egg-like form just about level with the kneecap. This egg form that's nestled in the back of the knee is the top of the gastrocnemius (which is the calves), and also a few precious arteries, nerves, and a cautious, protective coating of fat. To easily refer to this form, let's give it a name. How about Egg... I know, not very creative but, it is now Egg.

When the knee bends, it pulls the hamstring tendons away from the femur, and they stick out even more. Egg gets swallowed up.
When the knee completely bends in on itself, we of course can't see much of the hamstrings or its tendons anymore... but we can see how this soft tissue overflows and creates a donut around the knee. Visually speaking, this squishy donut is a nice contrast to the hard and sharp knee in the front. This is like a really extreme example of squash and stretch. Anatomically speaking, this protects Egg from being painfully crushed every time you squatty, which, historically speaking, you had to every time you potty. I'm sorry.

Alright guys, if you think you want to dive deeper into studying anatomy, head over to the Premium section, where we'll examine each muscle in depth, and compare body type variations of the upper leg. You'll also get assignment demonstrations, ebooks, 3D models, all that jazz.
Assignment
For this assignment let's change it up. Instead of doing quicksketch studies, let's do good ole' anatomical tracings. Download the model photos below and do a tracing, dissecting the anatomy of the upper back leg. You can put a piece of tracing paper on top, or preferably, do it digitally. Check out my Anatomy Tracing lesson if you need a refresher.


