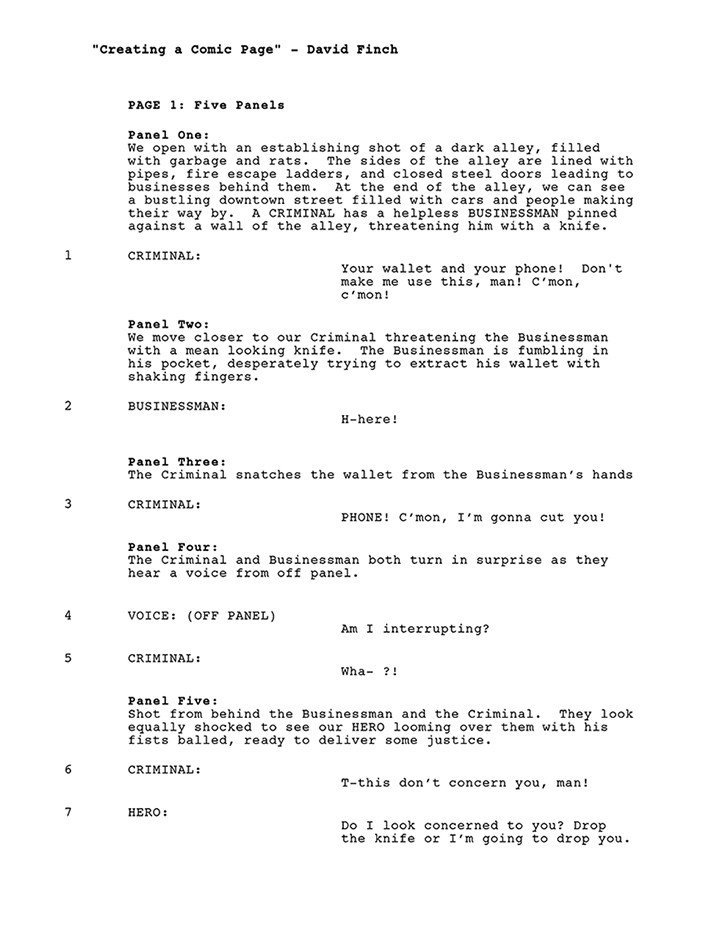
Look through the scripts I've provided and start to make a game plan for how you want to proceed. Be sure to read the scripts a few times to make sure you understand both the story and how you want to present it. Think about how you would approach each script, and be sure to take note of challenges you may run into. If you have a flair for writing, feel free to write your own script and follow along as well. Page one of the script can be found below. PDFs for page one, and the two other scripts are located under the "downloads" tab above.
This is my very first comic book page pencils. I tried to do some justice to the original, which comes from Under the Red Hood. I never thought I would ever reproduce a comic page in my life. I see a ton of mistakes, your feedback is greatly appreciated. It is my hope that as the course goes along, I can improve little by little.
Thank you so much @Jean Claude de La Ronde for your valuable feedback. I have a question. Should I draw my panels to the Live/Trim margin, or is it ok to draw them the way I drew them this time around to the smaller size? thank you in advance. I will try to keep an eye on those tangents.
Account deleted
Great start. Pay more attention to your 180 degree rule of placing the camera. The other thing is to keep an eye out for those tangents. You got some in Panel 2 Robin is standing on the bottom panel border - Panel 3 (Robin's Ear and hair touching the side panel) - Panel 5 - Batman's head is touching your top border of the panel -- Panel 6 (Close up of face...check the chin it's touching the panel border). Overall, we all have a tendency to frame our subjects too tight within the frames. SKetch your stuff out then take a second pass at it and pull back your camera 25-35% in order to avoid creating tangents. What I mean by "Pullback the camera" is basically scale down your drawing so you have some head room around your characters or if you're going to cut into your character, don't cut at any body joints, cut in the Meat! Board On!
Creating a comic page based on previous lessons starting with lay outs character and panel design
-rule of thirds
-compositional shapes
-lighting
Shot selection:
P1: establishing shot
P2: long shit POV upshot
P3: medium shot
P4: close up
P5: longshot over the shoulder pov down shot
P6: wide shot long
P7: close up
P8: long shot
P9: wide shot
P10: POV upshot
Wow really big share with these sample scripts, that's amazing. That will make for REALLY great storyboard practice, that's fantastic thank you for the handy link to that. I'm going to try and work my way through the whole list, at least for thumbnails.
Hello guys, im from Brazil. In this video David broke the “180 rule” in the last panel, right? I’ve read the script and made a sketch for the page and its 5 panels, and the last one gave me trouble. I’ve tried to be faithfull to the script, bug in order to respect the rule my hero was seen from behind. There are some rules and cases when you could break this “180 rule”? Thanks in advance!
i think breaking the rule works for two reasons: (1) the characters in panel 4 are looking off panel so it makes sense that in panel 5 we see what they're looking at, and by seeing the hero from their POV, (i.e. behind them, so that we're sharing their sight-line), we experience the hero as they do (2) the introduction of the hero, a new character, permits a reverse shot from the previous angle so that we're not looking at the back or side of the hero. If we want to see his face in a three-person scene, we need to break the 180 rule. So maybe the 180 rule only really applies for two-people. I don't know though! I'm new to this.
The first four panels could be considered just an focal length change of the camera lens but still the same camera position. The last panel is when the position of the camera changes, as well as the tilt.
Are there any best practices for when or when not to use a borderless panel? For example, when I was thinking about the layout, it felt like panel 5 would be an ideal place to use borderless to showcase the hero. The word balloon sizing is off, but was looking to see if the lines would fit in the panels.
With David Finch's examples, between panels 1 and 5, we see the two characters flipping from left to right. In the previous lesson he introduced us to the 180 rule and also warned about flipping the camera angle. In his example it didn't look off and ran smoothly from panel 4 to 5 (to me anyway).
So, my questions are... 1. Does the 180 rule apply from panel to panel, rather than taking the whole page into account? E.g. you could keep moving the camera angle around by 180 from each panel to the next, and within a single page having the camera angle move a whole 360 (or more) around the characters/ scene?
2. Can you break the 180 rule by using the character's POV to lead you to a new camera angle?
Going from panel 4 to 5 was also very smooth for me. I think David's page is a perfect example of when breaking the 180 rule helps better serve the story.
My interpretation of the 180 rule is that it helps establish a smooth flow when going from frame to frame. It helps reinforce our knowledge of the environment and the relationship between whoever is in the scene and allows us to focus on the action.
Right at the beginning of the page, David sets the scene and establishes whose on the left and right and what's going on behind them. I don't have to figure that out as I'm going from panel to panel, and instead can focus on a dude getting mugged. And in panel four when the two look towards the hero, it sets an expectation that I'm going to be surprised. The hero's reveal is sudden and shocking and I believe breaking the rule helps bolster the impact of the scene.
So I guess if I had to answer, the 180 rule applies for as long as it serves the narrative whether it be for a few frames or a whole page if not longer.
And to me, using the character's eyes is a fantastic way to introduce a new camera angle. I don't know if David did this consciously or instinctively because he never mentions it.
I’m a comic book artist for Image, Marvel, DC, and others.
Help!
Browse the FAQs or our more detailed Documentation. If you still need help or to contact us for any reason, drop us a line and we’ll get back to you as soon as possible!
Look through the scripts I've provided and start to make a game plan for how you want to proceed. Be sure to read the scripts a few times to make sure you understand both the story and how you want to present it. Think about how you would approach each script, and be sure to take note of challenges you may run into. If you have a flair for writing, feel free to write your own script and follow along as well. Page one of the script can be found below. PDFs for page one, and the two other scripts are located under the "downloads" tab above.
Page One