Pulling. Lifting. Fighting. Hugging. Arms do stuff… You want the anatomy mastery to draw them freely in any position and from any angle. Then your drawings will have more believable action and expressiveness. In this first lesson I’ll teach you the basic forms of the arm bones and how their joints work together for incredible mobility.
Skelly has three arm bones - the humerus, radius, and ulna. The arm is designed to allow the hand to twist. But it's not just the hand that twists. The motion is spread out through the whole forearm. When twisting, the radius bone rolls across the ulna bone. The ulna and humerus do not move.

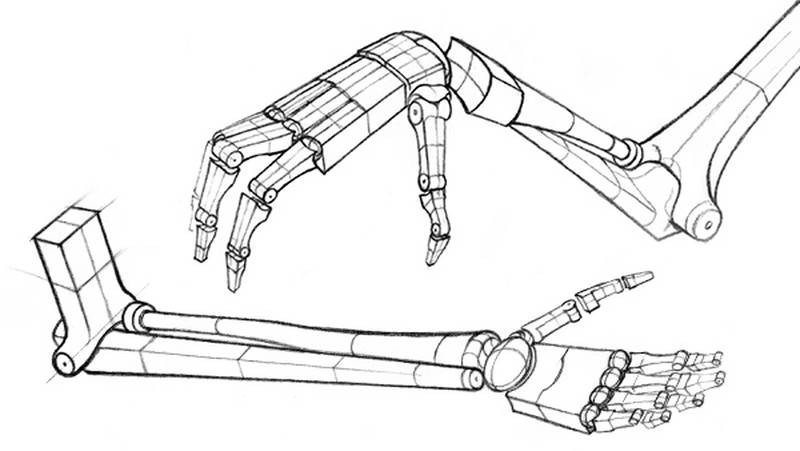
There's two words we should know for this arm-twisty-business. "Supination" and "pronation." Supination refers to the palm-up position when the radius and ulna run parallel to each other. When your arm is soup-inated, you can hold a bowl of soup. When your arm is pronated... You spill the soup and you have a pro-blem. During pronation, the radius crosses over the ulna at an angle, to bring the palm down.
With that in mind, let’s begin at the humerus.
Humerus
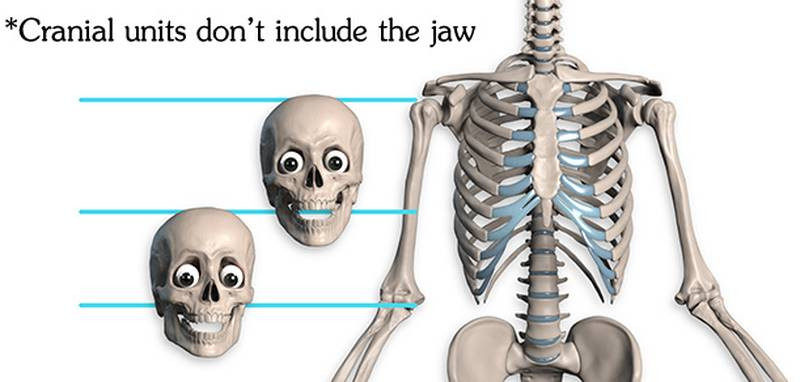
That's the bone of the upper arm. It's about the same length as your rib cage, that is, two cranial units long*. If a person is standing with their arms at rest, the elbow will line up with the bottom of the rib cage.

Let’s look at the simple forms. The humerus is like a croquet mallet. Plus the head of the humerus, which is a sphere glued on at the top, on the side and slightly to the back. This sphere pops into the glenoid cavity of the shoulder girdle to make a ball & socket joint, which has the greatest range of motion of all the joint types.
Between the epicondyles is a ball and a bowtie. The ball on the side connects with the radius bone. The bowtie fits into the ulna bone.
Ulna
So, the ulna bone. It's always gonna be on the medial side of the elbow. At the wrist, it will be either medial or lateral as the radius swings around it. But fear not! There's an easy trick to it. The ulna will always be on the same side as the pinky. In fact, that bump you've always had at your wrist. It's not a tumor. It's actually the tip of the ulna.

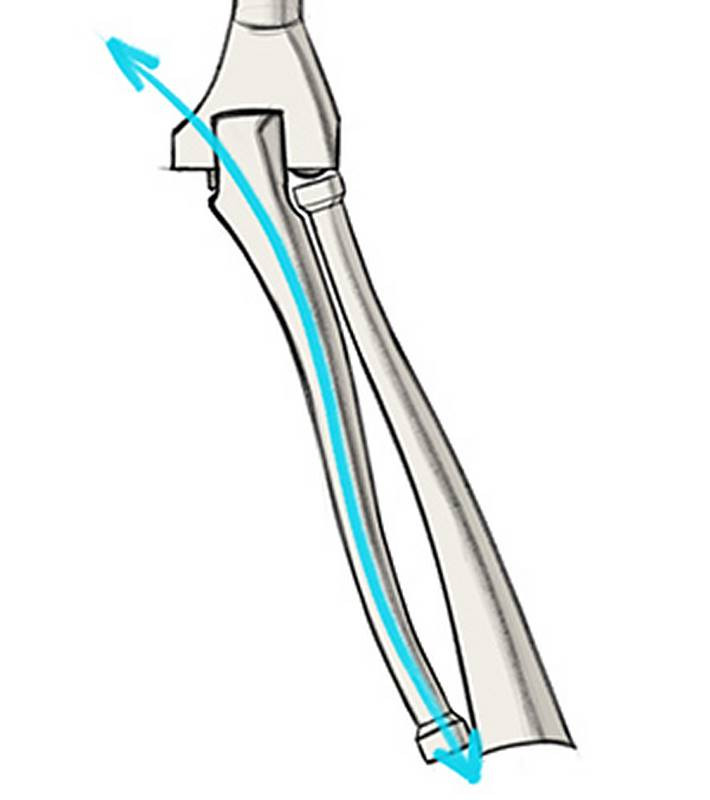
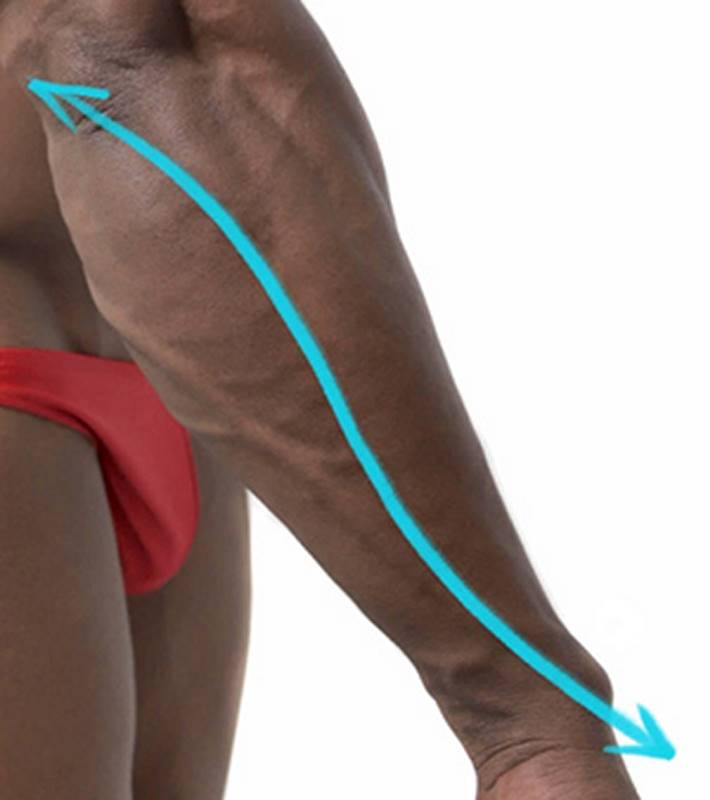
The ulna is thicker at the elbow and thinner at the wrist. This is the opposite of the radius. Together, they're like a puzzle. Also, the ulna has a slight S curve, which is subcutaneous the whole way down on the back of the forearm. It'll appear as a ridge or furrow on the surface. So, watch for that S curve rhythm when you're tracking the muscles.


Luckily for us, there's another superficial part of the ulna - the elbow. "Ulna" actually means "elbow." The fancy technical name for that bump on the elbow is olecranon.
This is a good landmark, and it pairs with the epicondyles perfectly. When the arm is straight, the epicondyles of the humerus and the olecranon line up horizontally.
When the arm bends, the olecranon lowers, and forms a triangle. Easy-to-see bony landmarks all working together.
Remember the bowtie-shaped bump on the front of the humerus? The ulna grips that guy like a wrench. The olecranon is the back of that wrench. This makes a hinge joint.
Finally, the wrist joint… or rather, the lack of a wrist joint. There’s a big gap between the ulna and wrist bones. This gap actually allows for more hand movement. Try it. You can adduct your hand out pinky-side maybe 50 degrees or so. But the radiocarpal joint is much tighter, so you can only abduct on the thumb side about 20 degrees.
Radius
That’s the guy that swings around the ulna to pronate or supinate the arm. It’s always lateral at the elbow, and always thumb-side at the wrist.
The radius is cylindrical for most of its length, in its upper 2/3s or so. As it gets closer to the wrist, it becomes boxy. That's why you'll typically see artists simplify the wrist to a box. It's thinner at the elbow and wider at the wrist, which I hope by now you've figured out is the exact opposite of the ulna's design. It also explains their joints. The ulna is much wider at the elbow and it's the primary elbow joint. The radius is much wider at the wrist and it's the primary wrist joint.

At the wrist, the radius forms a large ellipsoid joint. Its concave shape holds the hand in place.
In the next lesson, we'll learn about the bones of the hand! I hope this lesson was not only helpful but also a little funny. Wait, no. That's not it... Also a little... hilarious? A little...
Assignment
Your assignment is to do a tracing over model photos and find the simple forms of the humerus, radius, and ulna. Basically, you’re like a human x-ray machine. To figure out where the bones should go, look for clues from visible landmarks. Be sure to create an account so you can subscribe to the Proko newsletter so you can get a FREE model sample pack to follow along with this lesson.


